Tailscale + Mosh
We love Tailscale for its effortless VPN setup and secure remote access via SSH. But SSH has its problems: slow connections cause lag, unstable connections and roaming cause repeated disconnections. These kinds of problems can cause terminal coding on mobile devices to become a nightmare.
That’s where Blink comes in. You can pair Blink with Tailscale and upgrade your connection from SSH to the more stable, more responsive Mosh protocol, letting you code without the delays and hiccups. You can access any machine in your Tailscale network for development, server management, and more, from your mobile devices with optimal performance.
But what if you don't have root access to the Tailscale node to install mosh, or are having trouble navigating the installation process? Don’t worry! Now, Blink can automatically install Mosh for you for a lot of different platforms, no root access necessary.
Install Tailscale and find your Host information
Step 1: Install Tailscale on your local network
Follow the instructions for your platform:
Step 2: Initialize Tailscale SSH on your local network
On the host of your local network, advertise SSH by running tailscale up --ssh. For more information, see Use Tailscale SSH.
Step 3: Take note of your Hostname or IP address
On your host machine, retrieve the IP or Hostname from the Tailscale app.
- For Linux users, enter the command
tailscale ipto return the device's Tailscale IP address.
$ tailscale ip
100.126.153.111
fd7a:115c:a1e0:ab12:4843:cd96:627e:9975
- For macOS users, open the status bar icon for the Tailscale app and look for the Hostname or the IP listed in the dropdown.
- For more information, checkout the Tailscale guide.
Step 4: Install Tailscale on your mobile devices
Install and sign in to Tailscale on your iPad or iPhone. You can find the Tailscale app in the App Store. Make sure you log in with the same account as on your server, so the two devices can see each other. For more information, see the Tailscale website.
Configure Blink
Step 1: SSH to your Tailscale Node
Remember that Hostname or IP address you got in Step 3? Well, now’s the time to use it. To check that everything is working, let's start with establishing a ssh connection to the Tailscale node.
Open the Blink app on your device, and in the Blink Shell run the command ssh username@<hostname> where username is your Tailscale user name, and hostname is your Tailscale Hostname or IP address.
Note that no authentication was required, as Tailscale is automatically using your tailnet identity to establish the SSH connection.
Step 2: Mosh to your Tailscale Node
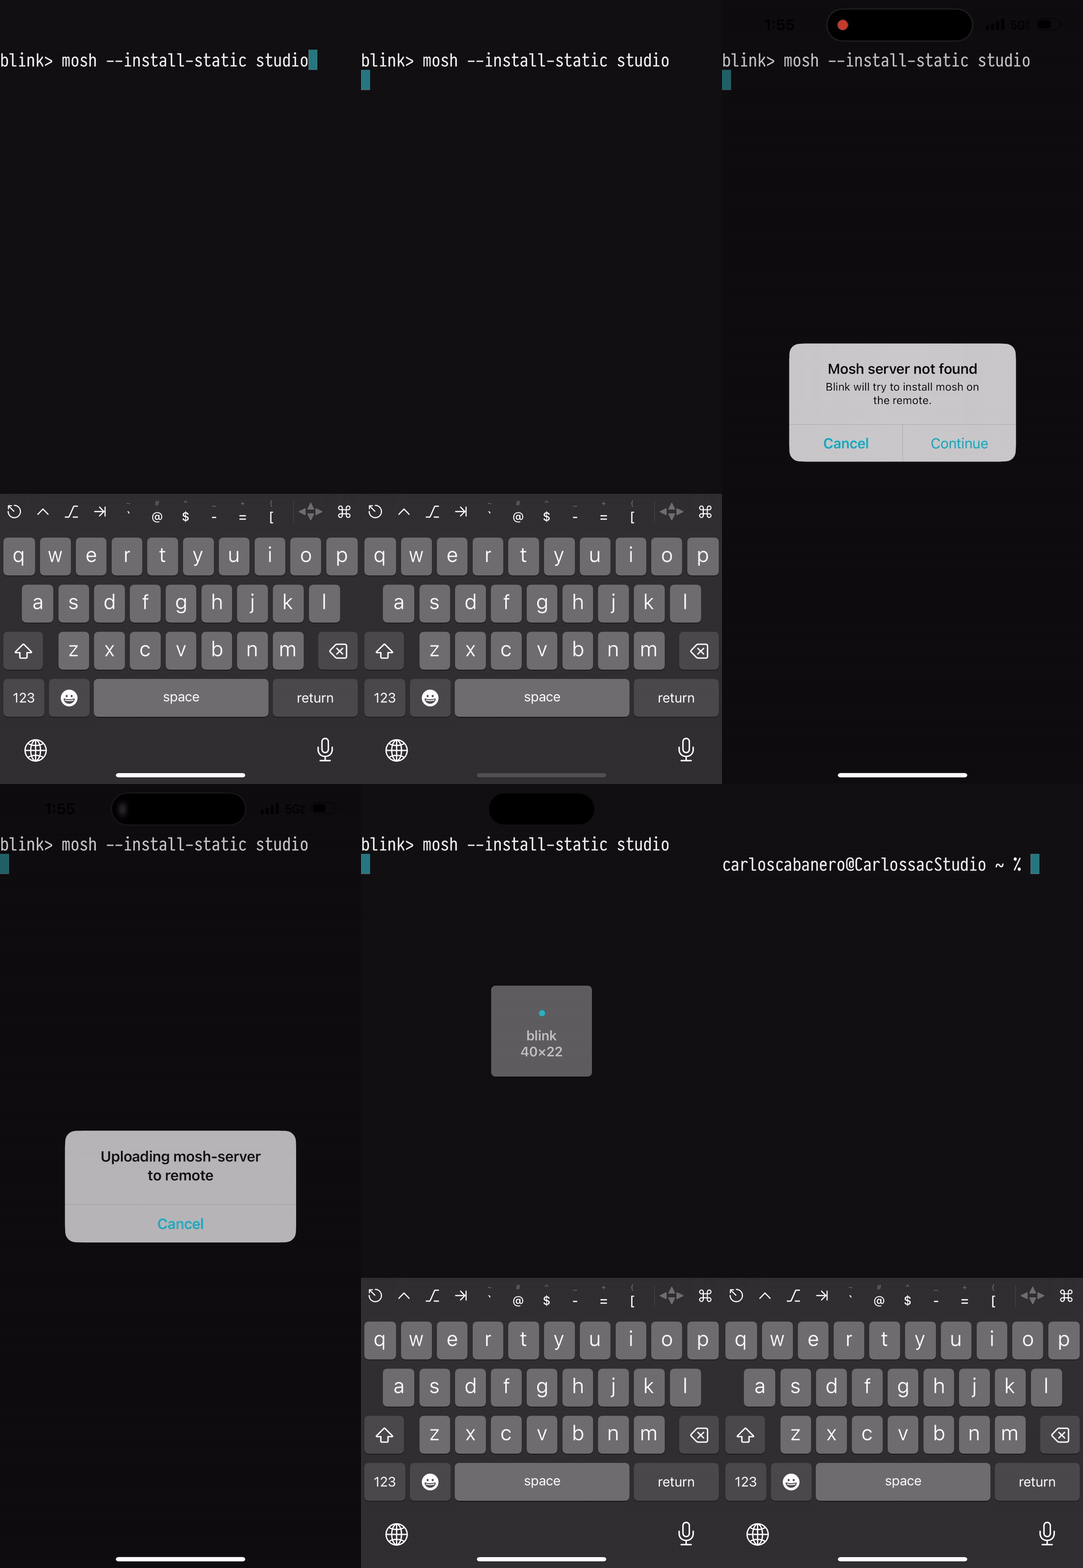
Now, it is time to upgrade our connection to Mosh. Run the command mosh --install-static <username>@hostname where username and hostname are the same parameters you used before. Blink will automatically request permission to install mosh-server on your host, and set up everything for you.

Going forward after installation, you only need to call mosh <username>@hostname as you may be used to.
Step 3: (Optional) Set up a host within Blink
If you do not want to type username@hostname all the time, or you want to access the remote file system of your Tailscale node from the Files.app, you can set up a host within Blink. To do so, follow the steps in “Create and Access Hosts Using Blink Shell”.
Mosh away
Now that you’ve got Tailscale and Blink working together, you’ve got the power of Mosh to access your VPN anywhere and anytime. You could potentially connect from your home WiFi, drive to the airport, and take a plane to a different country –and stay connected all the way. No dealing with SSH breaking those connections or lagging behind as you type. It’s almost like having your desktop in the palm of your hand.